

If you want to make your testimonials stand out, Canva animation is an easy way to make them pop. Follow my step-by-step guide.
Why use testimonials?
When you’re working for yourself, whether as an editor, author, electrician or virtual assistant, social proof speaks volumes. Social proof is a rating, review or testimonial. It tells potential clients not to worry because other people have used your services and have had a fantastic experience.
Canva has lots of templates you can use to make some cracking testimonials for use on social media and other platforms, but to really make them sizzle, a bit of animation goes a long way.
Step-by-step Canva animation guide
Let’s get straight to why you came. The instructions are for Canva Pro on desktop.
Here’s one I made earlier (hit Play):
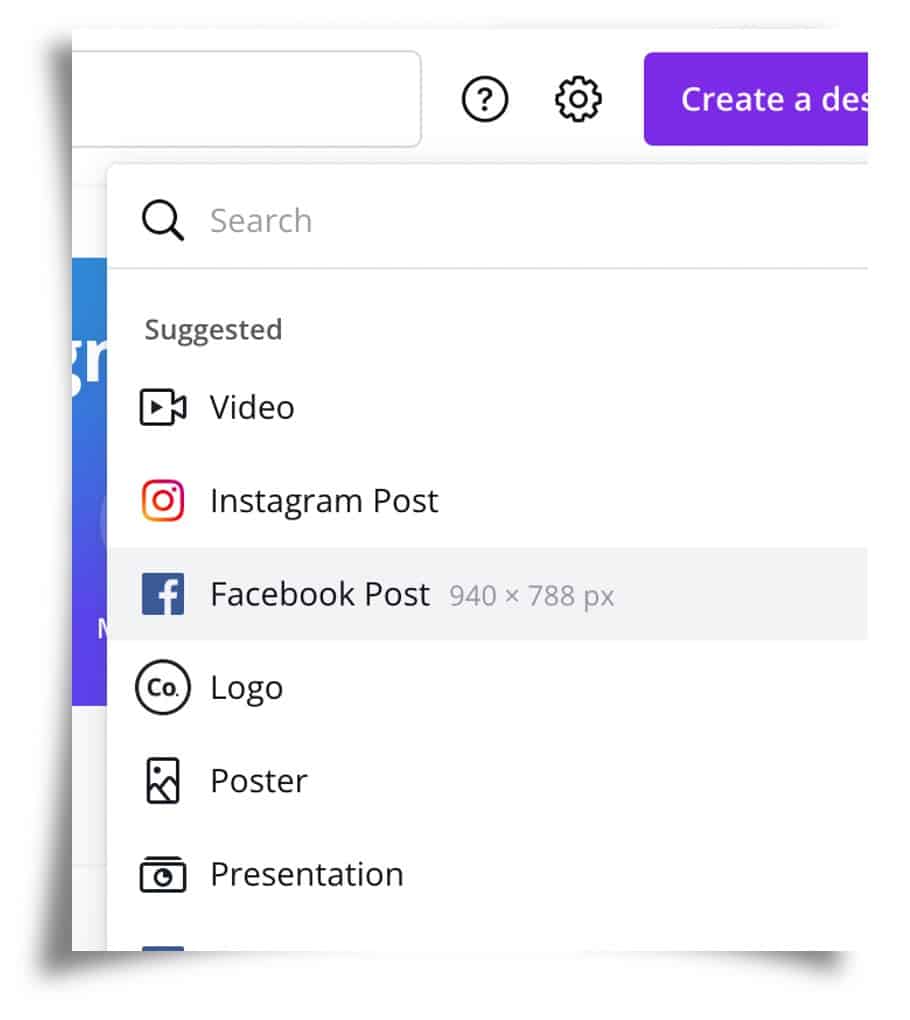
- Go to canva.com and select ‘Create new design’ top right.
- Choose the type of design. I’ve selected ‘Facebook Post’, as that returns a large selection of testimonials in Step 5. If the size isn’t quite right, as long as you have Canva Pro, you can resize your design at any time for different uses.
- This will open a new window with a blank canvas, ready for your work of art!
- Type ‘testimonial’ in the search box on the left-hand side of the screen and hit Enter.
- You’ll see stacks of testimonial templates appear in the search results.
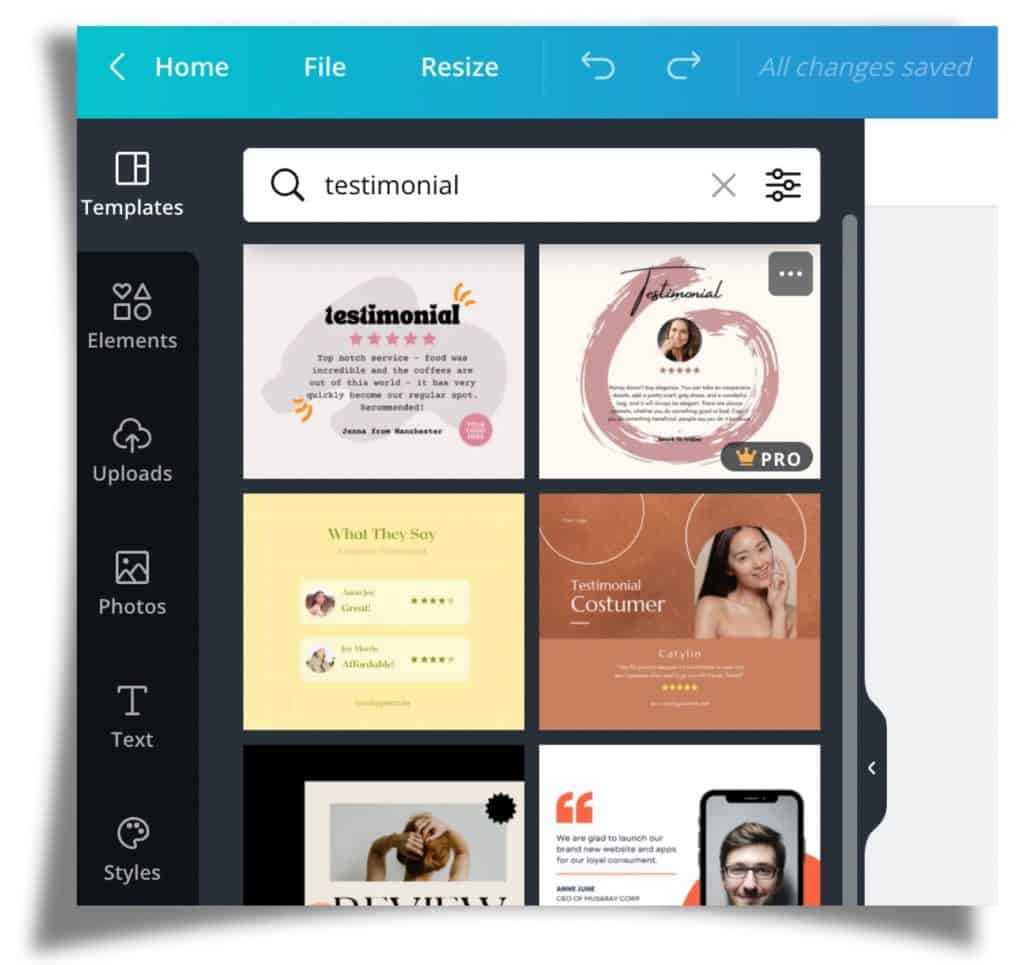
- Scroll down and see what you fancy. There are a few included in the free version of Canva, but to access a massive variety, you’ll need Canva Pro. You get a month’s free trial, so if you only need to create one dynamic testimonial, subscribe then remember to cancel before the end of your trial to avoid being billed.
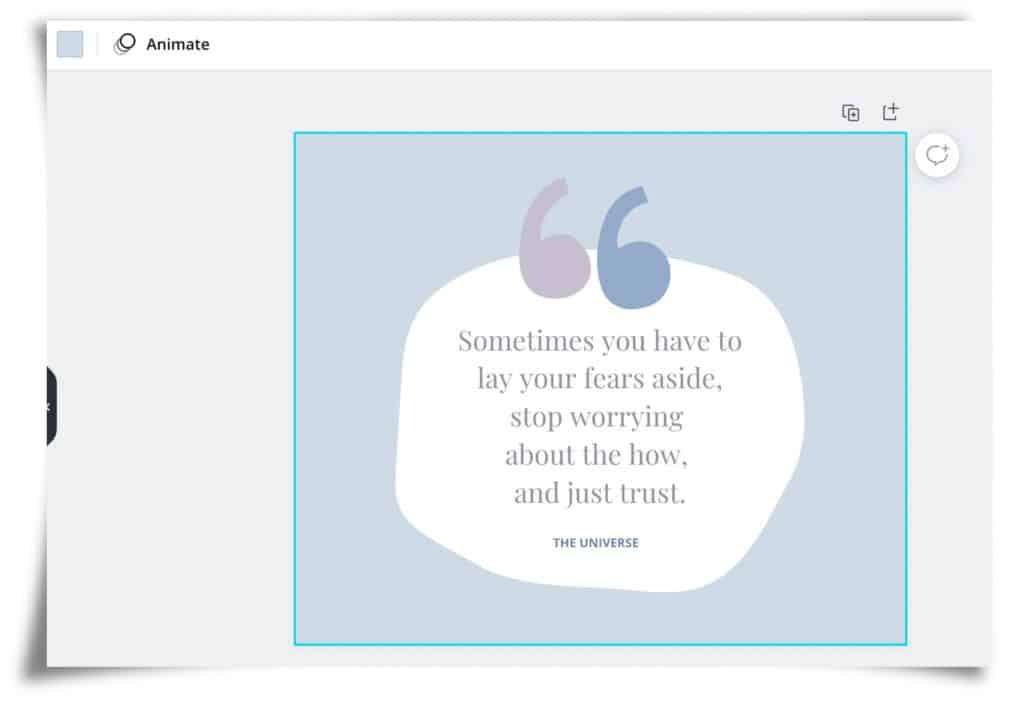
- Select the testimonial template that best fits your needs. I’ll show you how to change colours, fonts, photos, other elements, plus add that dynamic element too, so just pick one you like best for now, or that is closest to what you have in mind. I actually selected more of a quote template than a testimonial, as I liked the large quote marks and the simplicity of the design. I’ll be adding the five stars later.
- If you’re after a specific size, now’s the time to change it, before you start creating your work of wonder. Select ‘Resize’ from the top-left menu (only available with Canva Pro).
- Before you start making changes, it might be worth creating a copy of this starter design, so you can easily revert to the start if things go a bit awry. To make a copy, select the icon above your design that looks like two overlapping pages with a cross. This will create a duplicate ‘page’ below your design. However, there is an undo command top left, or you can use the keyboard shortcut for undoing if need be. (Cmd Z on a Mac, Ctrl Z on a PC.)
- This is where things get exciting! As you move your cursor across your design, you’ll see a turquoise border appear, then disappear as you move to another element. To change the colour of an element, simply click on it and the turquoise border will remain static, so you can be sure you’ve picked the right part of the design to play with.
- For example, let’s change the background colour. Once you’ve selected the background, you’ll see the little square box top-left of the design change to the same colour as the current background. Click on the box and a panel will appear.
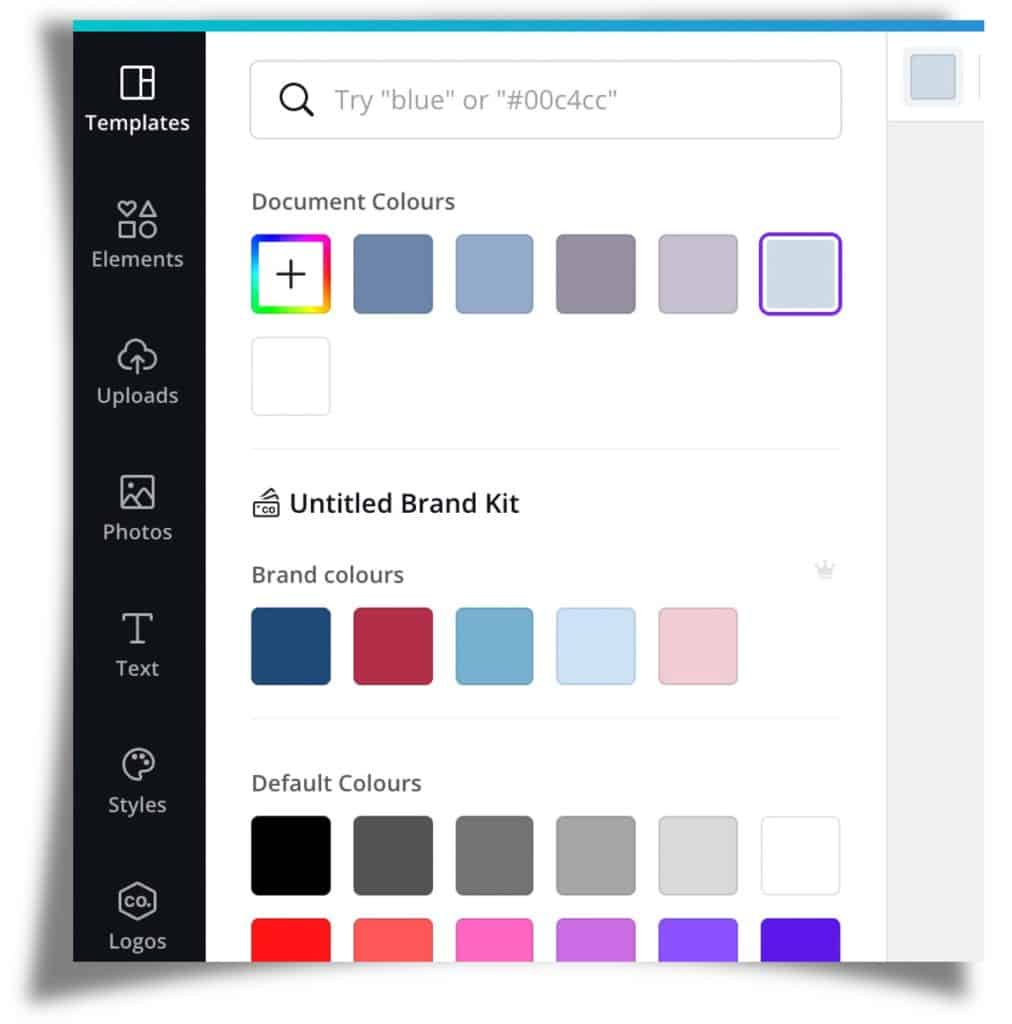
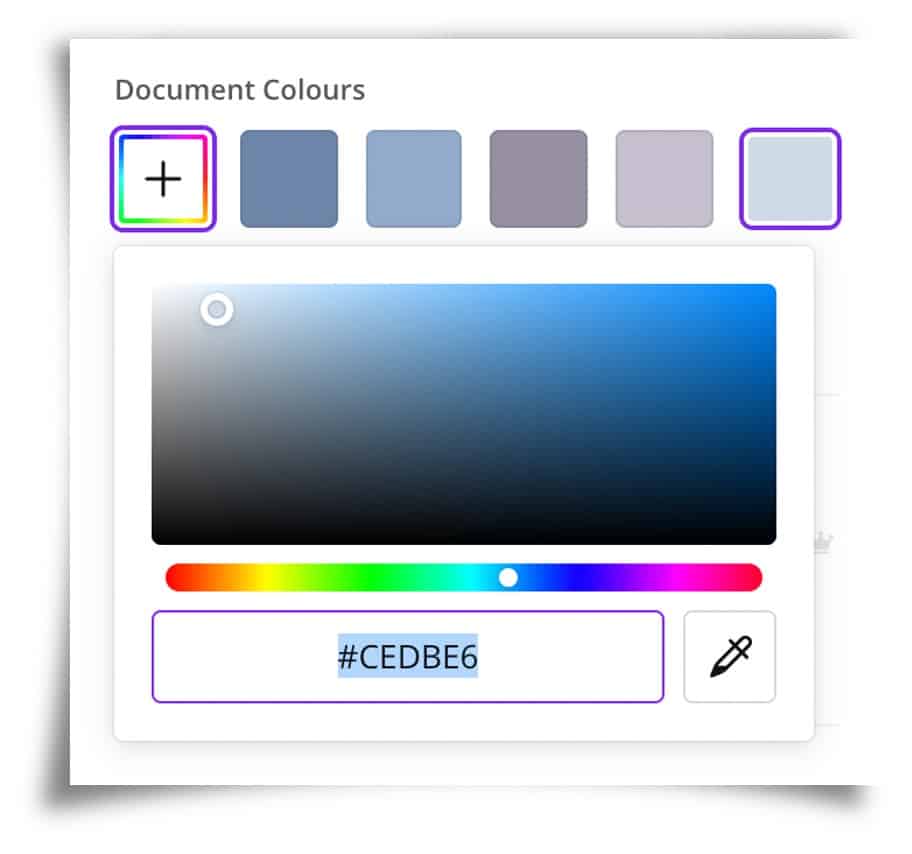
- If you don’t like any of the colours that appear (and there aren’t many yet in this view), don’t worry. You can have any colour you want! Click on the first box in the panel (containing a cross with a rainbow-coloured border).
- If you know the hex code of the colour your want, type this into the text box. You’ll see the background of your design instantly change. Alternatively browse around the colour picker box by using the slider.
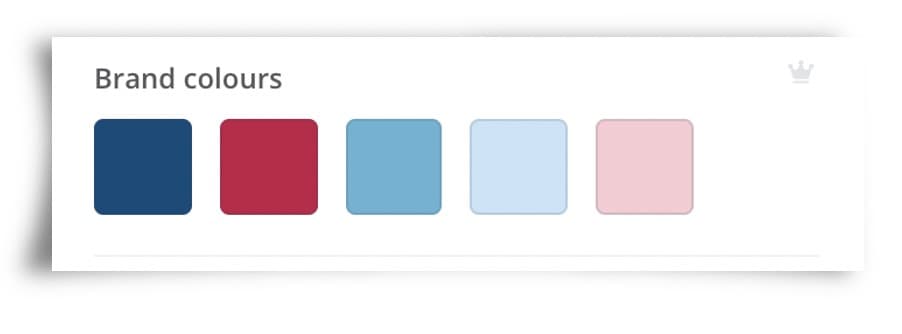
- If you have brand colours, one of my favourite aspects to Canva Pro is that you can store these in your Canva account, for instant use on any of your designs. It’s saved me pots of time.
- Once you’ve decided on your background colour (you can always change it again later), click anywhere just outside your design and the colour picker panel will disappear.
- Repeat steps 10 to 13 to change the colour of any elements of your design. Text is a bit different, but just as easy, as we’ll see in the next step.
- To change the colour of text in your design, select it just as you did above, so you can see the turquoise border around it.
- In the menu above your design, click on the ‘A’ underlined with a colour (the same colour of the text as it currently stands), and the same colour picker panel will appear.
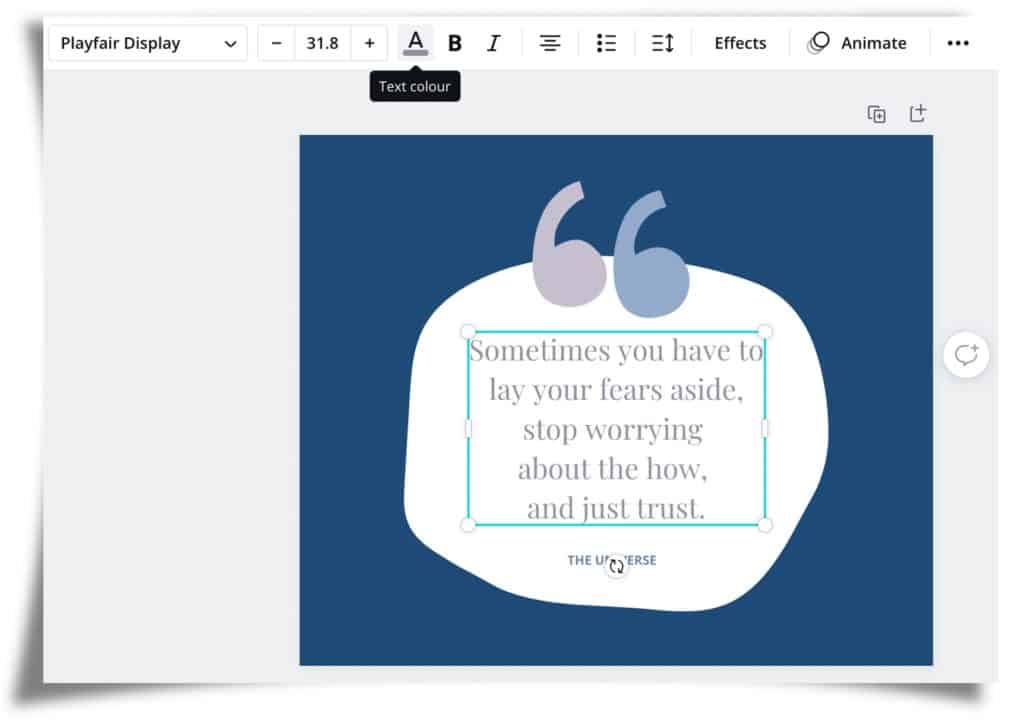
- Now you know what you’re doing, don’t you? Repeat steps 11 to 13 to change your text colour.
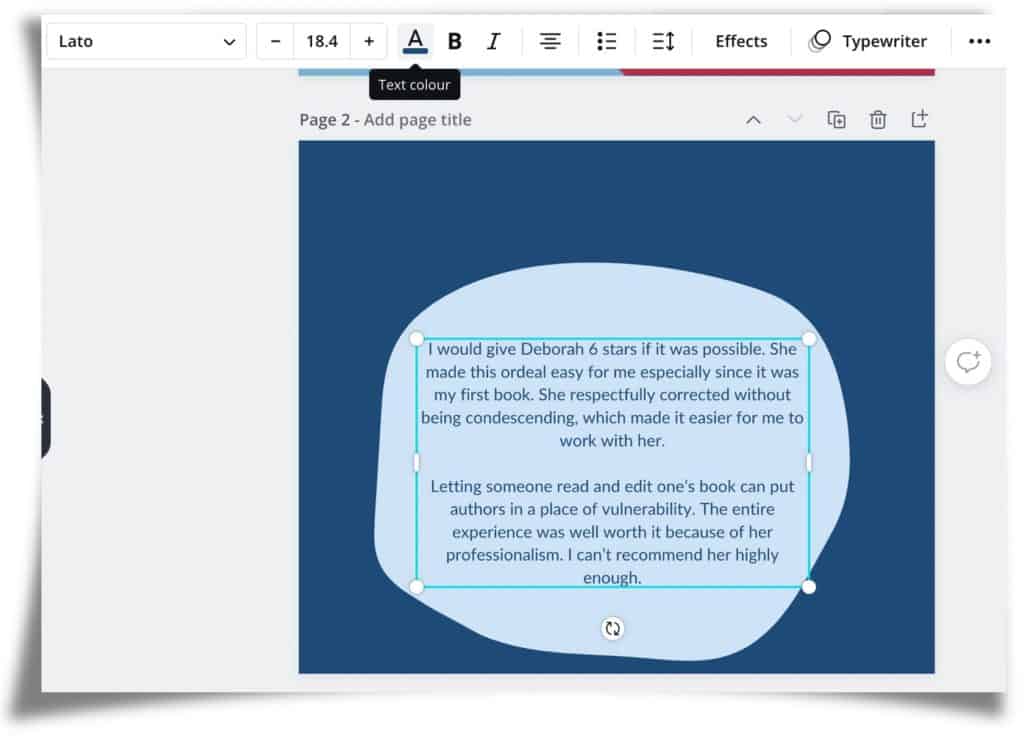
- To alter the size of the text, select it if it isn’t already bordered in turquoise and enter a new size in the box containing a number (menu above your design), or tap the minus or plus sign either side of it. The change is instant on your design. Don’t forget you can use Undo if you want to go back. To change the font, find what you want in the drop-down menu to the left of the size box.
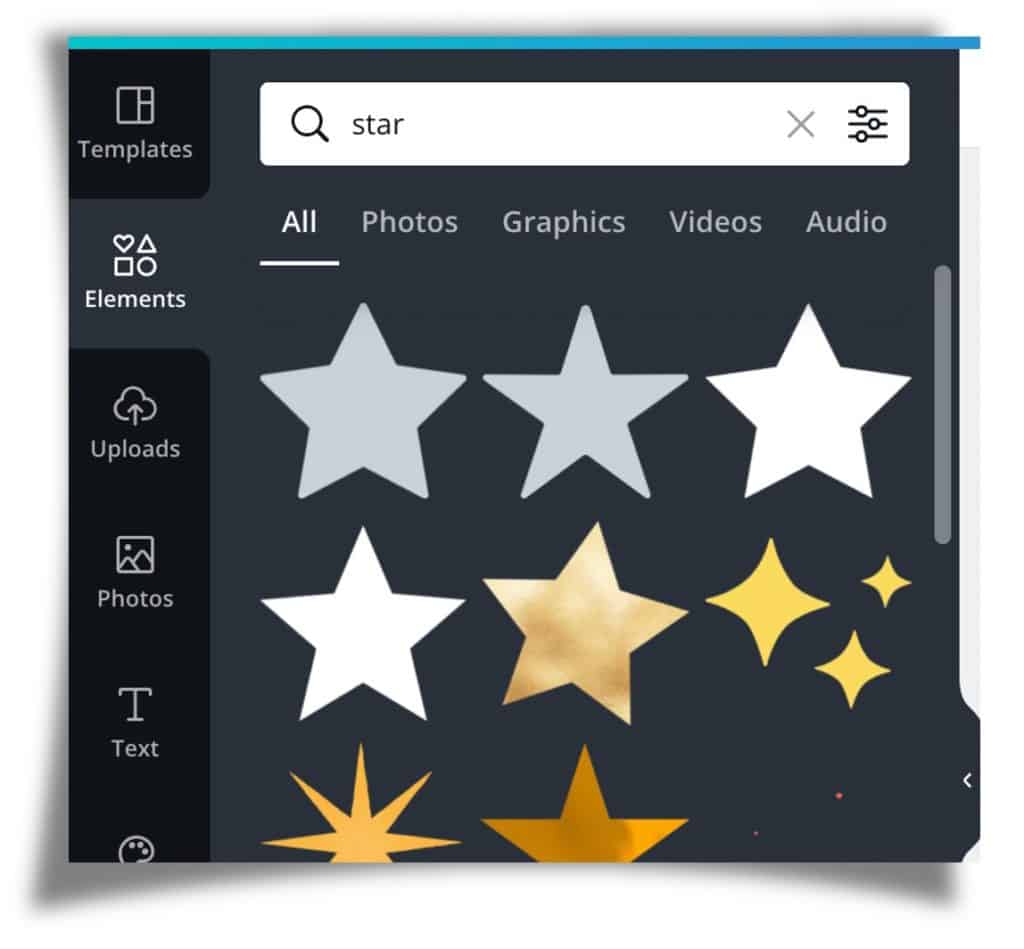
- If, like me, you’ve picked a design that doesn’t have stars, but you’d like to include stars on your testimonial, select ‘Elements’ from the menu on the far left of the screen, below ‘Templates’.
- Type ‘star’ into the search box and you’ll be greeted with a variety of stars to choose from. As with the template designs, Canva Pro includes a far wider choice.
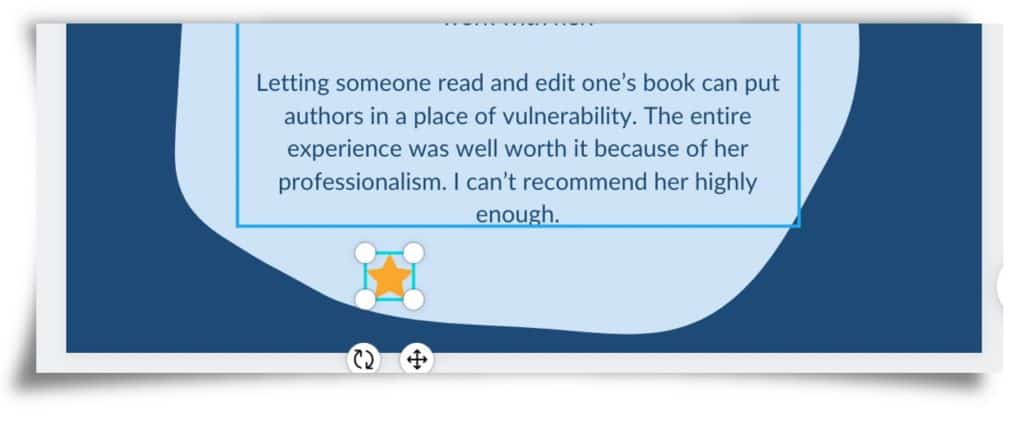
- Tap on the star you like, and it will appear on your design. It will probably be far too large, so just drag it at one corner down to the size you need. Make sure you grab the corner, not one side, otherwise it will crop instead.
- To move it into position, either put your cursor in the middle of your star and move it to where it should be, or for finer adjustments, shunt it across or down with the arrow keys. Taps on the arrow keys will move it fractionally, while holding down the Shift key while tapping the arrow keys will move it further with each tap.
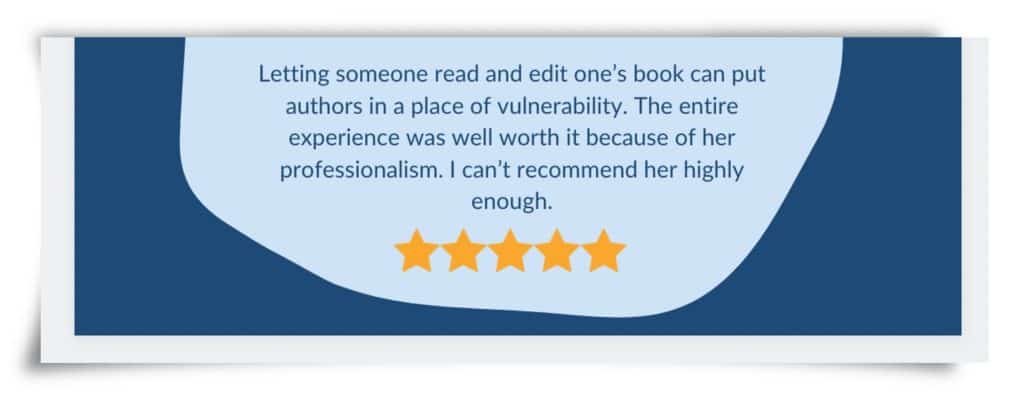
- Once you’re happy with the size and position of the first star, copy and paste its twin. (Cmd C then Cmd V on a Mac, Ctrl C then Ctrl V on a PC). Move the second star into the correct position. Canva helpfully shows a dotted red line to let you know when it’s perfectly lined up.
- Repeat step 25 for the remaining three stars (assuming you want five!)
- To revise or add other bits and bobs to your Canva testimonial (e.g. shapes, photos), browse around the ‘Elements’ tab and the ‘Photos’ tab in the far left panel. Select whatever you like, then resize, change colour and move around as described above.

- The finishing touch is the dynamic element, only available in Canva Pro. Let’s get snazzy! I chose to only make the text and the stars dynamic, rather than my background shapes and quote marks, as I felt that would be a bit over the top for my purposes, but the world is your oyster!
- To animate the text, select it by clicking on it so you can see the turquoise border.
- Click on ‘Animate’ in the menu above your design and a panel will appear to the left.
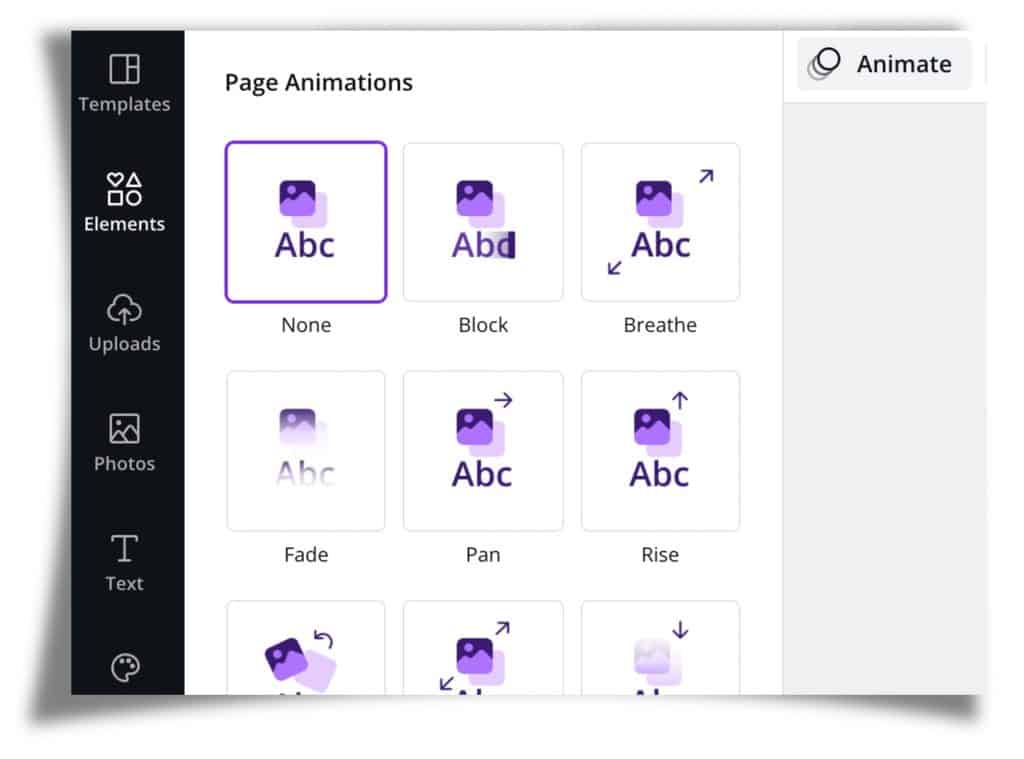
- Move your cursor over the different animations, and you’ll see a preview of each on your design. I love doing this! I chose the ‘Typewriter’ animation. As my testimonial is quite long, I felt the animation I’d picked was a bit too fast, so I slowed it down. More about that in a minute!
- Tap anywhere around your design to remove the animations panel. To see how your design looks so far, hit Play in the uppermost menu (to the right of ‘Share’). Your design will open in a preview pane and will look amazing! Click ‘Close’ once you’re admired your handiwork.
- To slow down (or speed up) the animation, you need to do it for the whole design, not just the individual element (even if you’re only animating the text). So, click anywhere on the background of your design, making sure you’re not clicking on an element within the design.
- Because Canva knows that your design is now an animation, a stopwatch appears in the menu above, with ‘5.0s’ next to it (i.e. 5 seconds). Click on this.
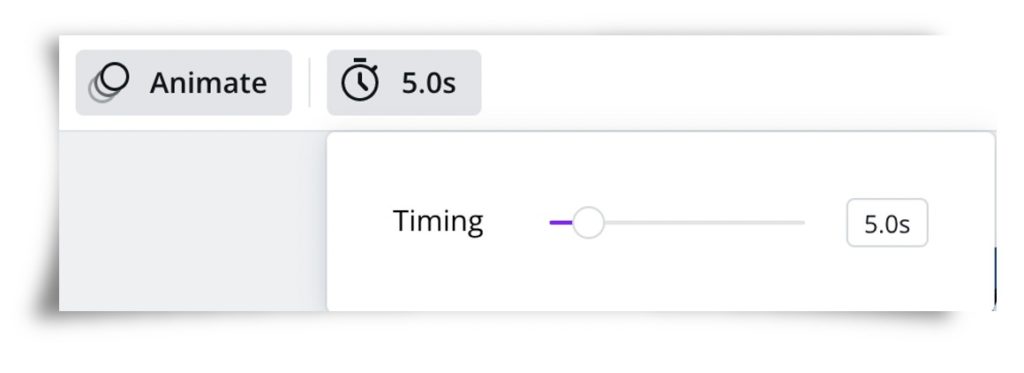
- Either use the slider to increase or reduce the timing of your Canva animation, or type in your desired length. I chose 10 seconds.
- Play your animation again to check it’s as you want it. If the timing still isn’t quite right, select the stopwatch icon again and re-adjust.
- When you’re ready to share or download your amazing Canva creation, tap on the ellipsis button in the top far-right corner and select the most approprate action for you.
Ta-dah! Feel free to share your Canva animation in the comments below. I’d love to see them!


Leave a Reply