

Designing a book cover (or magazine, report or anything-else cover) is easy using Canva. Follow this step-by-step guide, crammed with screenshots.
I’ll shortly be sending out my book manuscript to beta readers, and some will prefer to read it on paper, rather than screen. Honestly? I would too. (I’m a good ol’ fashioned book lover, ah, the smell of paper, the hefty weight of those pages already read…sorry, gone off track).
Rather than spend a fortune in inkjet toner and paper, I’ve decided to order a small batch of printed copies online (more in an upcoming post about printing options for small batches).
That means I need some kind of book cover. If I’m going to the trouble of getting my book printed, even for just 10 people, I’m going to make sure it looks purdy. (This may be the only way it sees the light of day as a “real” book!)
If you're going to the trouble of getting your book printed, even for just 10 people, might as well make sure it looks purdy. Share on XStep-by-step book cover design
Let’s get to it!
Before you begin, you will need a Canva account. This can be the free version, no need to part with any money to create a book cover. However, if you want extra features, e.g. the ability to resize your image, create folders, tons of extra images and resources, Canva Pro is the way to go.
These steps and screenshots were taken on a desktop, not mobile or tablet. The user interface (layout of options) may be different on smaller devices.
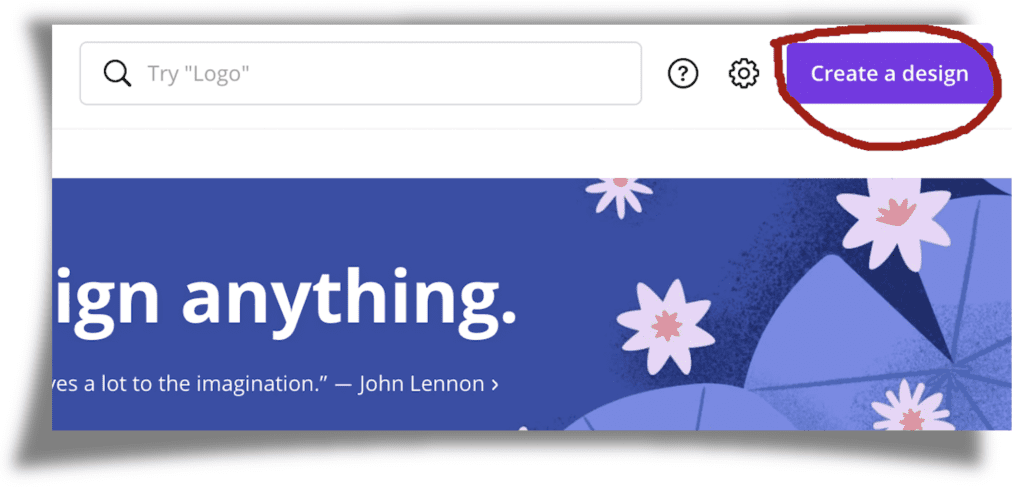
- Go to canva.com and log in to your account.
- Click on the ‘Create a design’ button top right.
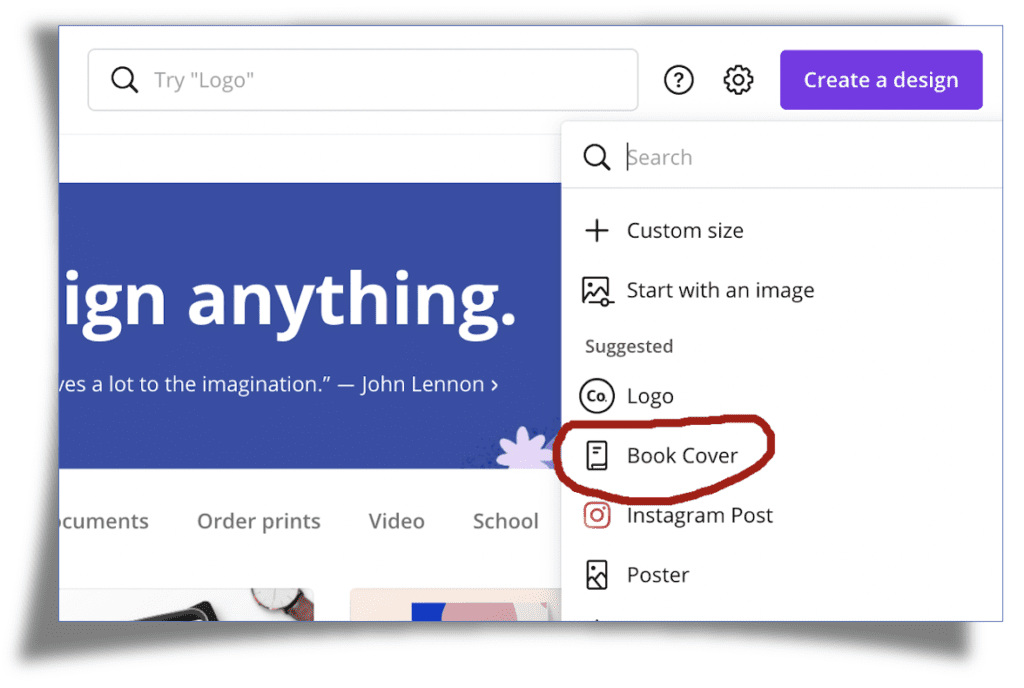
- Select ‘Book Cover’ from the list of options that appear.
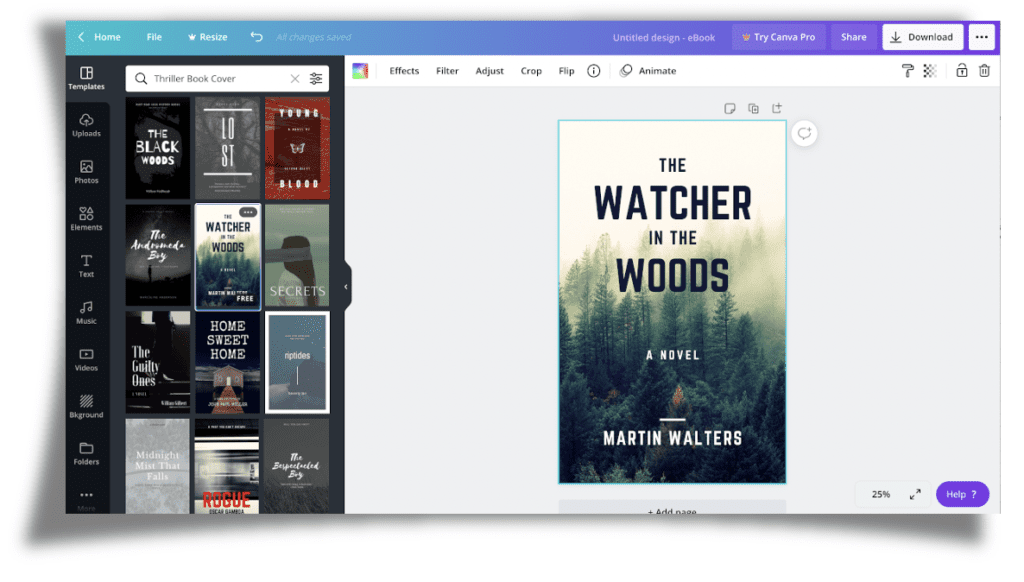
- You will see a large choice of template book covers appear in the left-hand panel. These are grouped by genre to make things even easier. You could start a cover from scratch, but why reinvent the wheel?
- To see the full range of covers in a genre, click on the genre title, e.g. ‘Romance Book Cover’, ‘Thriller Book Cover’.
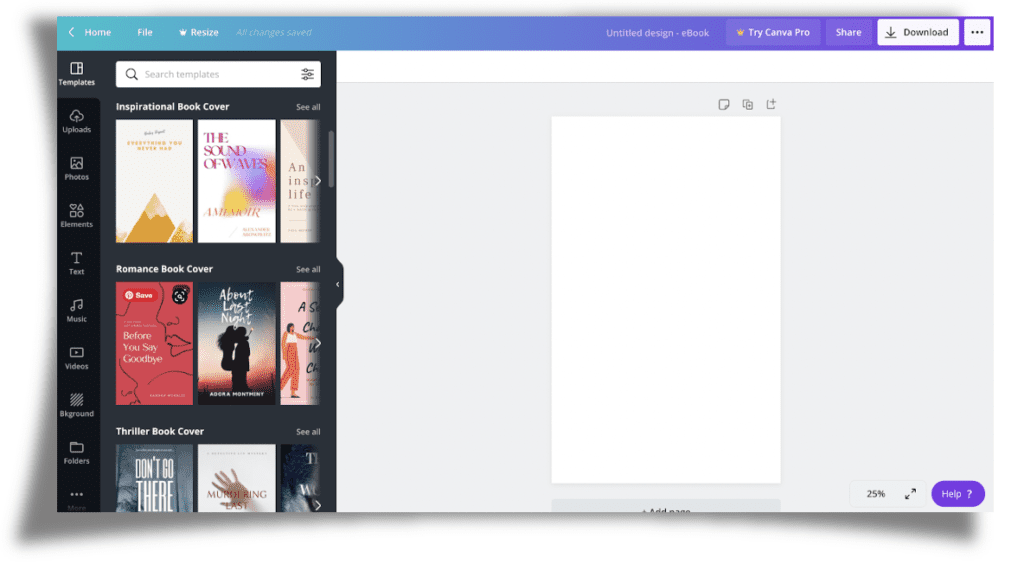
- Pick a template that you think would be a good starting point for your cover. Remember, you can change the image, the colour, font and size of the text, the layout; in short, you can change everything and make it your own. These templates are for inspiration and guidance for those of us without expert design experience.
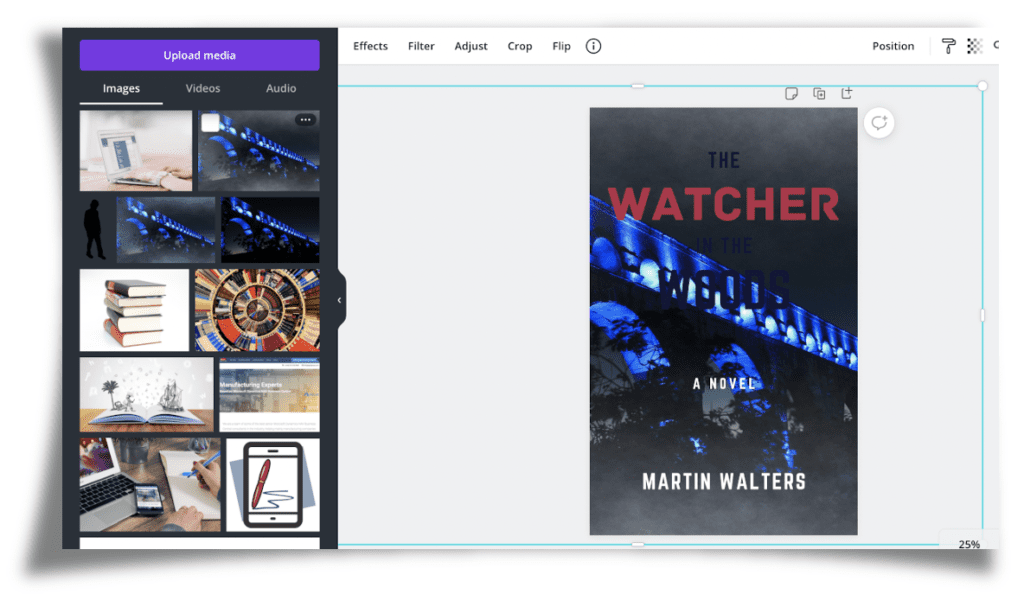
- To change the font, click on a line of text. A pale blue (turquoise?) outline will appear around the selected text, to show you which text you are working with. A list of fonts will appear in a panel to the left.
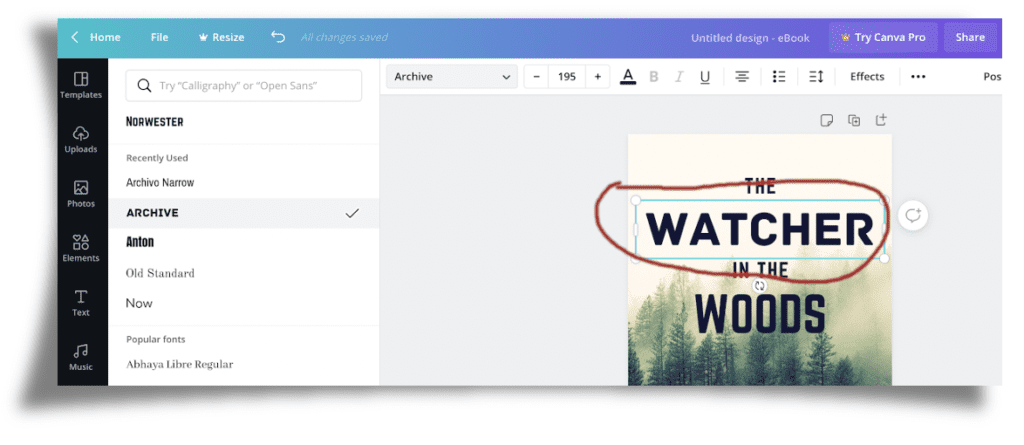
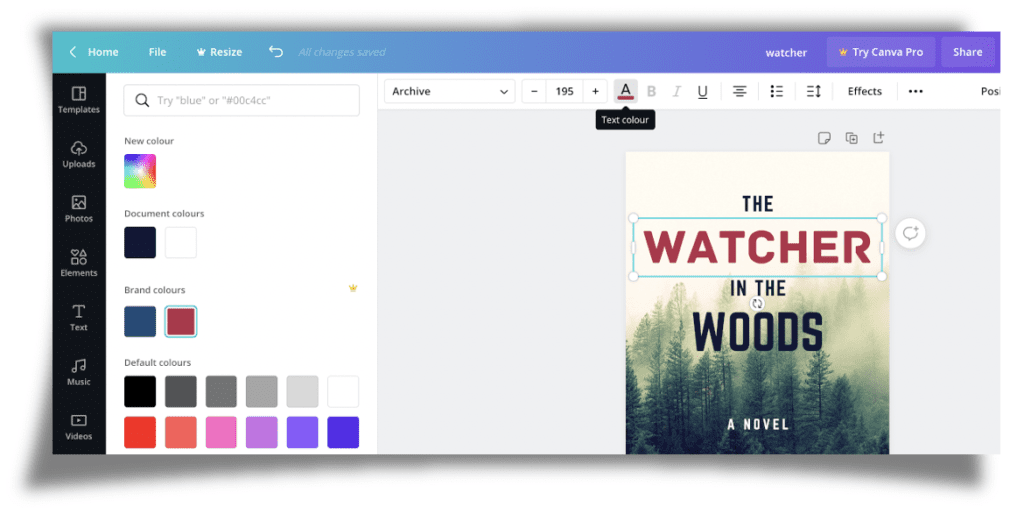
- Play around with the font. To change the colour, click on the ‘A’ button in the options ribbon above. The underline colour of the ‘A’ will show you which colour you have chosen. You can also change the size, alignment (left, centre etc) and other bits and bobs. Have a play around.
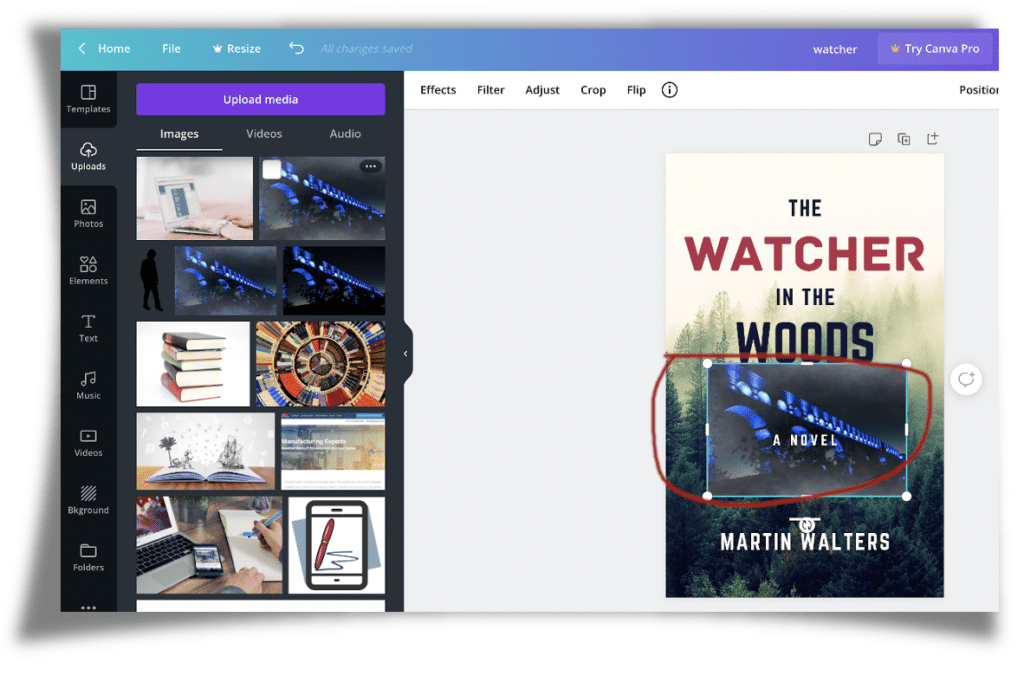
- To change the background image (you may want to do that first, so you know where to position the text, it’s up to you), select ‘Uploads’ in the far left vertical panel of options, then ‘Upload media’.
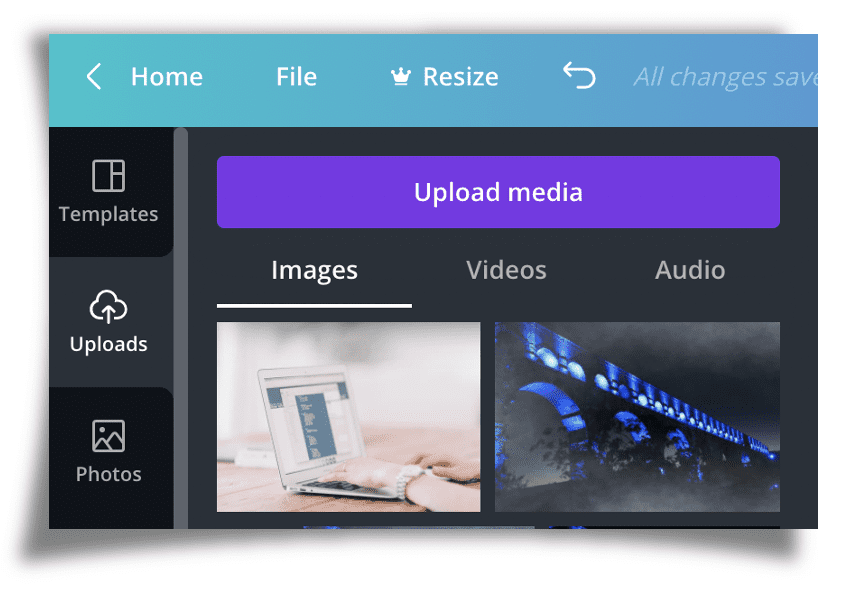
- You’ll be given the option to upload an image from your local computer – ‘Device’ – or from your account on Google Drive, Instagram, Facebook, Dropbox and more.
If you’re stuck for an image, there are plenty in Canva that you could use. Lots are free, and if you upgrade your account to the paid option, there are stacks more. To see these, select ‘Photos’ in the far left vertical menu.
You can also find stacks of free images, copyright-free and royalty-free, on image websites such as Pexels, Pixabay, StockSnap, Unsplash and more. Just save an image from these sites to your local computer, then upload by selecting ‘Device’ as described above.
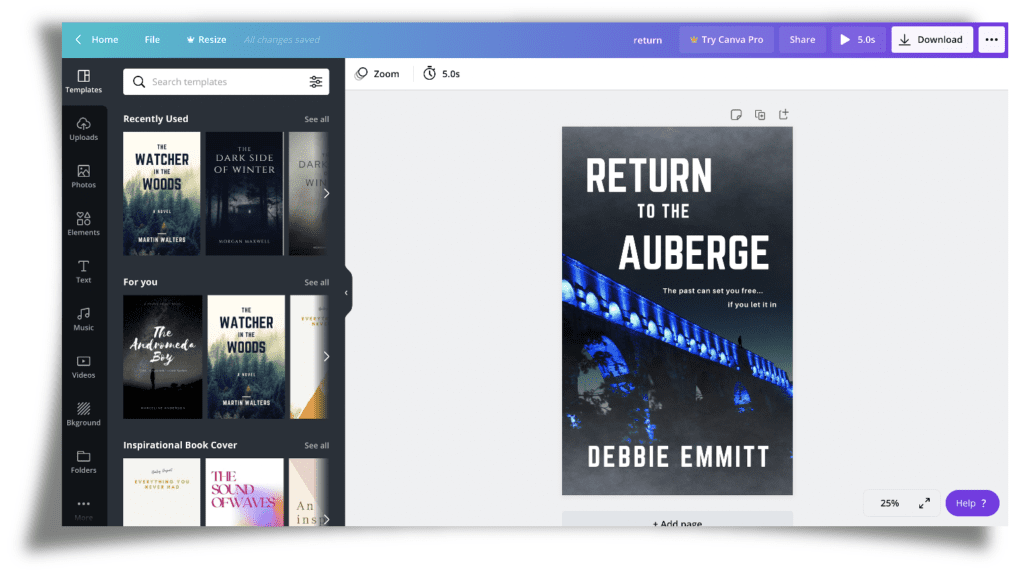
- Don’t be afraid to experiment. You can make a few different covers to A/B test (send two or three slightly different versions to readers/subscribers/friends) by clicking on the Duplicate button top right (next to the Bin icon).
Here is my finished front cover:
Final advice
Remember, when designing anything, be it a book cover, website or social media cover, less is more. Don’t go all clip-arty or busy-busy-busy, unless you’re 100% sure it’s right for your brand (and even then, test it with people other than your immediate family to make sure).
Don't go all clip-arty or busy-busy-busy, unless you're 100% sure it's right for your brand. Share on XLet me know in the comments how you got on! What do you use to design your book covers?
PS. if you were wondering how I got the paper-curl effect on the screenshots through this post, I used Powerpoint, and followed the excellent advice of Adam Noar on Presentation Panda.
PPS. To get the 3D effect for your book cover that appears in the main image of this blog post, I used DIY Book Covers. That is not an affiliate link – other tools are available, neither is it an endorsement of their paid services (merely because I haven’t experienced them). I just found their free online tool to create 3D book covers really easy to use with a great end result.


Leave a Reply